Tuesday, November 29, 2011

Esau's Soup

I originally got this recipe from a Penzeys catalog; it was called Red, Red Soup. When looking [unsuccessfully] for a link to it, I found a virtually identical version here. The soup's two names come from the biblical account of Jacob and Esau--specifically the time when a very tired and hungry Esau (who, as an interesting side note, was very red and hairy at birth) got home, saw Jacob cooking some lentil stew, and demanded, "Give me some of that red stew!"

As you can see, this soup, unlike Jacob's, is not in fact red. But don't let that deter you.

Ingredients:
Olive oil (a couple tablespoons)
1 onion, roughly chopped
2 celery stalks, roughly chopped
2 carrots, roughly chopped
1 potato, roughly chopped
The cloves from 1 garlic bulb, peeled and roughly chopped
At least 1 c. red lentils (I probably used about 1 1/2 c.)
6 c. vegetable or chicken broth (or 6 c. of water and 6 t. of Better than Bouillon, which is what I used)*
2 bay leaves
2 lemons, halved (if you're using lemons that are really big, you might want to use just one)
Ground cumin (1/2 t. or so)
Ground cayenne, to taste
Salt, to taste (I didn't add much at all, because I didn't think it needed much)
Fresh parsley, chopped (optional; I didn't use it, because I didn't have any)

Heat the oil in a large stock pot over medium heat. Add the onions, and cook until soft--about 5 minutes. Then add the celery, carrots, potato, and half of the chopped garlic. Cook for a few more minutes, stirring occasionally, until the veggies begin to soften a bit. Add the lentils and the broth, stir to combine, and bring the mixture to a boil. Reduce the heat, cover the pot, and simmer the soup for about 20 minutes. Then add the bay leaves, the remaining garlic, and two of the lemon halves (save the other two for later). Cook for 10 more minutes, then remove the bay leaves and compost them. Using tongs, squeeze the juice from the cooked lemon halves and stir it into the soup. Squeeze the juice from the two fresh lemon halves as well, and stir it into the soup too. Compost all the lemon halves. Using an immersion blender or a regular blender (in batches, if the latter), carefully purée the soup. Stir in the cumin, cayenne, and salt. Garnish individual servings with parsley (if using) and an extra dash of cayenne, if you like.

* Both source recipes called for only 4 c. of broth, so that's what I initially added. Once I puréed it, it was so thick that it was kind of like a cross between mashed potatoes and soup. I wanted it a bit soupier, so I added some extra broth. It was still nice and thick the way I made it.

Comments:
This was absolutely delicious--we all thought so. It was so creamy and flavorful that Steve almost couldn't believe it didn't have any cream in it. I have a feeling it will be making its way into our stock pot on a regular basis this winter. The lemon and cumin were great touches. And I love that the soup is so inexpensive to make!

Friday, November 25, 2011

Garlic Mashed Parsnips

I've occasionally heard people talk about mashing parsnips like potatoes, and since I have so many parsnips on hand right now, I decided to try it. This particular recipe comes from here. I made 3 pounds' worth of mash, but I'll do what the recipe's creator did and list amounts for a 1-pound recipe instead.


Ingredients:
1 lb. parsnips, chopped into big pieces
4-6 cloves of garlic, peeled but not chopped (you could use granulated garlic instead)
1/3 c. (or so) milk
1 t. dried parsley (you could use chopped fresh parsley instead)
1 T. butter
Salt, to taste
Freshly ground pepper, to taste

Put the parsnips in a pot and cover them generously with cold water. Bring the water to a boil. Add the garlic cloves to the boiling water, and continue boiling until the parsnips are tender. Drain. Add the milk, parsley, and butter, and mash everything together. (I, like the recipe's creator, used an immersion blender, and it worked well. You could also use a food processor or even a mixer.) Once everything is mashed up, taste the mixture and then add salt and pepper as desired.

Comments:
These are really yummy. I'm glad I made such a big batch, because we're going to enjoy the leftovers!

Thursday, November 24, 2011

Italian Kale with Almonds and Raisins

Happy American Thanksgiving, everyone! In honor of Thanksgiving, here's a thoroughly unThanksgiving recipe. (That doesn't mean it doesn't make you want to give thanks!)

I've cooked with kale before, but this is the first time I've used Italian kale (a.k.a. lacinato kale). I got the recipe from Boistfort. I know a lot of my recipes lately have come from their site; they just have such a great database of recipes! You could make this with regular kale instead if you don't have any lacinato.


Ingredients:
1 bunch lacinato (or regular) kale
1 T. olive oil, divided
1/4 c. (or so) slivered almonds
4-6 cloves garlic, thinly sliced
1/3 c. water
1/4 c. (or so) raisins
1/2 t. salt (Seriously, start with just this much. You can always add more after cooking if you want.)

Remove the stems from the kale, and save them for another recipe (or compost them). Coarsely chop the kale greens. Heat 1/2 T. of the olive oil in a large skillet over medium heat. Add the almonds and cook for about 2 minutes, stirring frequently, until they're beautifully golden and fragrant. Remove the almonds from the skillet and set aside. Add the remaining 1/2 T. of olive oil to the skillet, along with the sliced garlic. Cook for a minute or two, stirring frequently, until the garlic starts to brown just a little. Don't let it burn, though. Add the water, kale, raisins, and salt. Toss/stir to coat. Cover the skillet and cook until kale is tender (about 8 minutes), stirring once halfway through the cooking time. Stir in the almonds.

Comments:
This is simple and delicious; it's got great flavor without being overwhelmingly salty. Of everyone at the table, Steve was its biggest fan. He thought it was fantastic.

Wednesday, November 23, 2011

Celery-Root Bisque

This is actually a hybrid recipe of this one and this one from the Boistfort site. This is my first experience cooking with celery root.


Ingredients:
2 tablespoons butter
1 tablespoon olive oil
2 large leeks (white and pale green parts only), thinly sliced (about 2 c.)
1 large onion, chopped
Celery root (celeriac), peeled and cut into 1/2-inch cubes (about 5 1/2 c.)
Russet potatoes, cut into 1-inch pieces (about 12 oz.)
2 c. chopped celery stalks (including leaves)
1 1/2 t. minced fresh thyme
1 bay leaf
7 c. chicken broth (or 7c. water and 7 t. chicken base, which is what I used)
1/3 c. whipping cream
Salt, to taste
Freshly ground black pepper, to taste
Additional chopped fresh thyme (as a garnish)

Melt the butter with the oil in a large stock pot over medium heat. When sizzling subsides, add the leeks and onion, and sauté for about 10 minutes, stirring occasionally. Stir in the celery-root cubes, potato cubes, chopped celery, 1 1/2 t. thyme, and the bay leaf. Add broth, increase heat to high, and bring to boil. Reduce heat, cover, and simmer until vegetables are tender, about 40 minutes. Compost bay leaf (oops--I forgot to do this and puréed it together with everything else). Using immersion blender, carefully purée soup in pot. (Alternately, carefully purée in batches in a regular blender or food processor.) Stir cream into soup. Season to taste with salt and pepper. Ladle soup into bowls. Garnish with additional chopped thyme.

Comments:
This is very, very good. It's smooth, rich (but not overly so), and has a beautiful celery flavor. The chopped thyme sprinkled on top complements the flavor of the bisque so well.

Happy birthday, Steve!

Tuesday, November 22, 2011

Stir-Fried Radish Greens

I've been holding on to this recipe for months now, waiting for another bunch of radishes. I found the recipe here, though I've since found several similar ones elsewhere online.


Ingredients:
1 T. (or so) sesame oil
Freshly pressed garlic (a couple cloves)
Radish greens (1 bunch), roughly chopped
1 T. (or so) shoyu (soy sauce) or tamari
1 t. (or so) rice vinegar
Hot sauce, to taste (we used Sriracha)

Put the sesame oil and garlic in a small, unheated skillet. Put over medium heat and cook until the garlic is sizzling and fragrant but not browned. Add the radish greens and stir/toss to combine. Continue cooking until the radish greens are wilted and tender--a couple minutes. Transfer the greens and garlic to a small bowl (discarding any liquid left in the skillet). Add the shoyu and rice vinegar to the greens, and toss to combine. Add hot sauce to taste. You can add the hot sauce to individual servings if desired.

Comments:
These were absolutely delicious; I look forward to repeating the recipe. The one downside is that radish greens reduce so much during cooking that we were left with a total of maybe half a cup once I cooked them. One of the similar recipes I found mentioned using chard in addition to the radish greens or instead of them. That could definitely increase the yield and subsequent deliciousness.

Monday, November 21, 2011

Twice-Baked Potatoes

I've always been intrigued by the idea of twice-baked potatoes. They just seem like one of those naughty, delicious comfort foods that immediately decrease artery function by 50 percent. This is the first time I've ever made them, and it's also the first time I've ever tasted them. I got the recipe from Penzeys. I won't say it's healthy, but I think it's downright artery-friendly compared to some T-B-P recipes.


Ingredients:
2 medium russet potatoes
1 T. butter
1/2 c. (or so) cheese (I used shredded white cheddar)
2 T. sour cream or Greek yogurt
Seasoning of choice, to taste (I used Northwoods Seasoning)

Preheat oven to 375 degrees F. Poke the potatoes several times with a fork. Bake them right on the oven rack for 1 hour, then remove them from the oven (but keep the oven on). Let the potatoes cool until you can handle them without burning yourself. Cut each one in half lengthwise. Scoop out the innards, leaving just enough potato in the skins so that they keep their shape. Put the potato innards into a bowl along with the butter, and break up/stir until the butter is melted. Add the cheese, sour cream, and seasoning. Mash everything together. Then scoop the mixture back into the potato skins. Put them on a baking sheet lined with parchment paper (foil should work too). Bake for 15 minutes, then broil for another 5 minutes until they're pleasantly browned.

Comments:
Yum. These were a hit.

Sunday, November 20, 2011

Apple-Cinnamon-Raisin Oatmeal

I know this one is a little out-there for a CSA recipe, but we did indeed get apples in our CSA box this month, so it's not cheating to post this! I came up with this particular iteration of the apple-cinnamon-raisin-oatmeal concept on my own, though I realize many people have done this before me.


Ingredients:
4 c. water
2 c. rolled oats
1/4 c. (or so) raisins
1 1/2 t. (or so) ground cinnamon
1 large-ish apple, chopped
Brown sugar, to taste (I probably used about 1/4 c.)

Bring the water to a boil in a medium saucepan. Add the oats to the boiling water and stir. Reduce heat so the mixture is barely simmering. Cook for about 8 minutes, stirring occasionally. Stir in the raisins, and continue cooking for another couple minutes, until the liquid is fairly well absorbed and the oatmeal is the desired consistency. (If it gets too thick, you can add a little water or milk to thin it out a bit.) Remove the saucepan from the heat, and stir in the cinnamon, apple, and brown sugar.

Comments:
This was a perfect breakfast for a snowy Saturday morning (a rarity around here). Everybody liked the oatmeal; Liam and Annika were particularly vocal and enthusiastic in their enjoyment. Steve thought it could stand to be a bit sweeter, but that problem can be easily remedied by having more brown sugar available for individual servings. I figure it's better to err on the side of not-sweet-enough and let people add more sugar as they see fit.

Saturday, November 19, 2011

Sautéed Chanterelles

I was thrilled to see chanterelles in our share this month. I've heard rave reviews but have never (before now) had occasion to verify them for myself. This recipe comes from Boistfort.


Ingredients:
Butter (a tablespoon or so)
Olive oil (a tablespoon or so)
Fresh chanterelles (half a pound or so), halved or quartered depending on size
Dry white wine (a splash or two)
Coarse salt, to tast
Freshly ground black pepper, to taste
Chopped fresh herb of choice (I used about a tablespoon of chopped fresh thyme)
Lemon juice, to taste

Melt butter with oil in a skillet over moderately high heat. Once the foaming mixture quiets down, add the chanterelles and sauté, stirring frequently, for 4 minutes or so. Then add the salt, pepper, and wine. Cook, stirring frequently, for a few more minutes--until the wine has evaporated and the chanterelles are pleasantly tender. Transfer the chanterelles (but not the remaining butter/oil mixture) to a bowl. Add the chopped herbs and lemon juice, and toss to coat.


Comments:
Mmmmmmm. Chanterelles definitely deserve the rave reviews. And this method of preparing them definitely bears repeating.

Thursday, November 17, 2011

Black Bean Soup

This is one of our trusty stand-by recipes. It ranks among my favorites because it is:

1. inexpensive,
2. easy,
3. healthy, and
4. delicious.

I got the original recipe from Stephanie O'Dea (a.k.a. The Crock-Pot Lady). A bonus about her slow-cooker blog is that almost all the recipes are gluten free. Which I'm not. But I know lots of people who are, so I can still appreciate it!

I'm not sure which labels/tags to attach to this recipe, because you really could probably use almost any veggie combination you wanted in it. I've tried lots of different veggies. This time around, I used a couple large carrots, some radishes, and some corn that I had in the freezer from our Pigman's summer CSA.


Ingredients:
Black beans (three 15-oz. cans, drained and rinsed, or about 1 1/2 c. dry beans that you've soaked overnight and then drained)
Tomatoes (one 15-oz. can [I use diced with green chiles] or a couple fresh tomatoes, chopped)
Your choice of veggies, chopped if needed (a pound or so. I've used a bag of unthawed frozen organic veggies in the past, and that works great too.)
3 c. broth (or 3 t. Organic Better than Bouillon base and 3 c. water)
Hot sauce, to taste (enough to add flavor but not a lot of heat)
Garnishes (any or all of the following: shredded cheese, sour cream, cilantro, avocado, lime wedges, more hot sauce)
Tortilla chips

Put the beans, tomatoes, veggies, broth, and hot sauce in a slow cooker. Cook on low for 6-8 hours, stirring occasionally if you, like me, can't just let it cook undisturbed. Using an immersion blender, carefully purée the soup until it's smooth. If you don't have an immersion blender, you can carefully transfer the soup--in batches--to a regular blender and carefully purée it that way. You may notice that I'm using the word carefully a lot. That's because this soup is, not surprisingly, hot. Stir more hot sauce into individual bowls as desired (I always add a lot), and garnish with some or all of what I listed. Serve with tortilla chips for dipping. You can also crumble chips over the top if you like.

Comments:
Need I repeat that this soup is inexpensive, easy, healthy, and delicious?

Winter CSA, Month 1 (November)

We got our first Boistfort Valley Farm winter CSA box yesterday! I'm so excited that we don't have to go on a seven-month CSA hiatus. Here's what was in the box:

You may notice the change in photo locale.
Everything will have to migrate from the kitchen counter to the kitchen table for the next few months,
because the monthly winter deliveries are, as you can see, significantly larger than the weekly summer ones.

Apples
Beets
Brussels Sprouts
Buttercup Squash
Butternut Squash (This wasn't on our list, but it was in the box. I think maybe we got it because the pie pumpkin is so teeny.)
Carrots
Celeriac (a.k.a. celery root)
Celery
Chanterelles (I was super excited to see these)
Delicata Squash
Garlic
Gourds (not edible)
Italian Kale
Leeks
Parsnips
Pears
Pie Pumpkin (a cute, tiny little one!)
Radishes
Russet potatoes
Thyme
Yellow onions

Tuesday, November 15, 2011

Simmered Cabbage with Bacon

I got this cabbage recipe here (it's called Wilted Cabbage on that site).


Ingredients:
Bacon, chopped (about 12 slices)
Onion, chopped (about 2 c.)
1/3 to 1/2 c. sugar
1 c. vinegar (I used chive vinegar, and it was a good choice)
2 t. salt, plus more to add later
Freshly ground black pepper, to taste
1 large head of cabbage, shredded (we probably had about 14 c. once we shredded ours)

Cook the chopped bacon until crisp in a huge skillet over medium heat. If you don't have a huge skillet, I recommend using a stock pot. This is a lot of cabbage. Once the bacon is crisp, remove it from the skillet/pot, but leave the bacon grease and keep the stove on. Add the onion, sugar, vinegar, 2 t. of the salt, and the pepper to the hot bacon grease. Stir to combine, then add the cabbage. You may have to add it in batches and wait until a batch has cooked down a bit before you can add more, unless you want a stovetop covered with cascading cabbage. Cook uncovered for about 15 minutes, stirring occasionally. When the cabbage has reached your desired level of tenderness, it's ready. Add more salt or sugar if needed. Serve the cabbage sprinkled with the bacon.

Comments:
This was tasty. Steve said he thought it would have been even better with either less sugar or more salt. After hearing him say that, I realized I totally agreed, which is why I changed the recipe to include a sugar range, so to speak, rather than a specific amount.

Monday, November 14, 2011

Roasted Sunchokes (Jerusalem Artichokes)

I don't know if you know this about Jerusalem artichokes, but they are neither from Jerusalem nor artichokes. Perhaps you've never even heard of a Jerusalem artichoke/sunchoke before. In that case, I can tell you that it's the tuber from a type of flower similar to the sunflower that is native to North America. I was thrilled to get sunchokes in the final delivery of our summer Pigman's CSA, because I'd never prepared, eaten, or even seen them before. I decided to roast them along with the sirloin tip roast we were having (from our quarter of beef).


Ingredients:
Sunchokes, scrubbed and peeled*
Seasoning, if desired

Preheat the oven. I preheated ours to 300 degrees F, because that's the temperature I was using to somewhat slowly cook the sirloin tip roast around which I nestled the sunchokes. But if you were just doing sunchokes, you could probably turn up the heat to 350 or more. They'd roast more quickly that way and perhaps brown better; you'd just have to keep an eye on them. Anyway, place the sunchokes in an oven-safe dish. Roast them in the preheated oven until they're fairly tender; a sharp knife should pierce all the way through one without much difficulty when they're tender. (Ours probably took an hour or more to cook at 300 degrees F.) Season the roasted sunchokes if you like.

* As you can probably tell from the photo above, I didn't actually peel the sunchokes before roasting them. I had read that the peel was edible, so I just scrubbed the sunchokes really well. It turns out that you can indeed eat the peel. But despite all my efforts at scrubbing, the sunchokes were still gritty. (Now that's some seriously tenacious earth.) After inadvertently polishing my teeth a bit with the grit from one piece of roasted sunchoke, I decided to peel the rest. It would've been significantly easier, I think, to do so before roasting. I certainly will next time.

Comments:
These were decent in texture and flavor, but I'm going to withhold final judgment until I can try this recipe again with peeled sunchokes. The grittiness and post-roast peeling process made it difficult for me to give them a fair trial this time.

Tuesday, November 8, 2011

Baked Acorn Squash with Apple Filling

I was hoping we'd get acorn squash this week so we could try this recipe. It's another Penzeys one, though I can't find it on their site.

Ingredients:
1 acorn squash, halved and seeded
2 T. dark brown sugar
1/4 c. (4 T.) melted butter, divided
1 c. peeled, cored, and chopped tart apples (e.g., Granny Smith)
Zest from 1 orange
2 T. raisins
A dash of freshly grated nutmeg (ground nutmeg from a jar will also work fine)
A dash of ground cinnamon

Preheat the oven to 350 degrees F. Place the squash halves cut-side-down in a baking dish. Bake for 40 minutes. When they're almost done baking, mix together the brown sugar and 2 T. of the melted butter. In a separate bowl, combine the other 2 T. of melted butter with the remaining ingredients. Once the squash is finished baking, remove it from the oven (but keep the oven on). Carefully turn the squash halves face-up. Prick the surface of each half several times with a fork, then brush each half with the butter/brown sugar mixture. Fill each half with equal amounts of the apple mixture. Put the baking dish back in the oven and bake the filled squash for another 30 minutes or so.

Comments:
Tasty. The tart applyness of the Granny Smiths was a nice touch.

Sunday, November 6, 2011

CSA, Week 23

Well, this was the final week of the Pigman's CSA season. It's been a wonderful season. Thanks so much to Jan and Dean Pigman for all their hard work! We've so enjoyed their veggies these past few months, and we look forward to more starting next June. Our winter share with Boistfort Valley Farm starts in a couple weeks. In the meantime, here's a look at what the Pigmans put together for us this week. The last week of the extended season is a double share, so I actually had to take two photos to get everything in.


Acorn Squash
Beets
Bell Peppers
Brussels Sprouts
Cabbage (HUGE!)
Carrots (lots)
Copra Onions
Delicata Squash
Garlic
Jerusalem Artichoke
Kale
Leek
Pie Pumpkin
Potatoes
Raspberries (totally forgot to get these in one of the photos!)

Saturday, November 5, 2011

Pot Roast

To me, pot roast is just a cold-weather kind of meal. Growing up in Hawaii, I didn't eat a lot of pot roast. It's a bit jarring even to think about, honestly. But pot roast feels totally right when the weather is the way it was here in the Northwest when we ate this on Friday--grey and chilly. This particular recipe comes from the Fix-It and Forget-It Cookbook, which contains about a bazillion pot-roast recipes that are all just about the same. (Don't get me wrong--it contains a lot of recipes for things other than pot roast. Like twenty-something baked-bean recipes, for example. But really, it's a useful cookbook. Wow. Not that you'll believe me after what I've just said about it.) Ahem. This particular pot-roast recipe does differ considerably from the typical one in that it calls for a lot more liquid--more like what you'd expect to see in a stew recipe. I figured I'd give it a shot. Not counting our CSA share, our beef, and what we had in our cabinets, I had to buy exactly zero ingredients to make this. And that always brings a smile to my face.


Ingredients:
Chuck roast or pot roast (3-4 lbs.)
1 envelope of dry onion-soup mix
Potatoes, cubed (I used 3 large-ish ones)
Carrots, sliced (I used 4 large-ish ones)
3 c. water*
1 t. beef bouillon granules (or 1 bouillon cube)*
Granulated garlic, to taste*
Salt, to taste*
Freshly ground black pepper, to taste*

Sprinkle all sides of the roast with the onion-soup mix, patting/rubbing in the mix so it sticks to the meat. Put the roast in a slow cooker along with the potatoes and the carrots. (I used a 4-quart cooker for this, and it was absolutely filled to the brim.) Mix together the water, the bouillon, and  a little bit of granulated garlic, salt, and pepper. Pour this mixture over everything in the cooker. Cover and cook on low for 6-8 hours. I always uncover and stir occasionally, despite the fact that some purists say this ruins everything.

*If you'd prefer, you could probably just use 3 c. of beef broth instead of these five ingredients.

Comments:
This tasted like pot roast. It wasn't fancy, and it didn't have complex flavors . . . and that's just the way pot roast is. But it was tender, hearty, and filling. Annika had two servings and was miffed at being denied a third. Liam barely ate anything. Steve and I didn't eat until after the kids were in bed, and Steve came up with the brilliant idea of having our pot roast in open-faced sandwiches with homemade chipotle mayo (and the pot-roast veggies on the side). It was quite good that way. Here's a photo:

Thursday, November 3, 2011

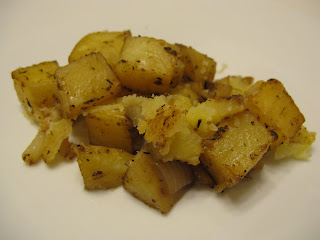
Seasoned Roasted Potatoes

This is a Penzeys Spices recipe. It sounded simple and delicious.


Ingredients:
Potatoes with skins, cut into bite-sized chunks (I used 3 medium-to-large Yukon Gold potatoes)
Yellow onion, chopped (I used half an onion)
Seasoning (a couple tablespoons; I used Northwoods Seasoning, as did the original recipe, but you could use something else)
Vegetable oil (a couple tablespoons; I used canola)

Preheat oven to 375 degrees F. Put the potatoes and onions in a 9x13-inch baking dish (or similar). Sprinkle the potatoes and onions with the seasoning, and toss to coat. Add the olive oil, and toss again. Put the dish in the preheated oven. Bake for about an hour, stirring ever 10 minutes during the first 30 minutes of cooking, then baking uninterrupted for the next 30 minutes or so. The potatoes will be nicely browned when done.

Comments:
We had these on the same night as the corn, and it must've been a disappearing-seasoning sort of night (aside from the steak, which was fantastic). The potatoes were so totally mediocre flavor-wise, despite the fact that Northwoods Seasoning has some serious flavor before roasting. Perhaps another type of seasoning would work better for this recipe, or perhaps it would work better to add the seasoning toward the end of the roasting process, because it was virtually undetectable the way we used it. However, the potatoes had a great texture and were excellent once we drizzled them with the reserved (boiled) marinade from the steak.

Wednesday, November 2, 2011

Teriyaki-Marinated Grilled Rib Steak

This is another one from Taste of Home: Backyard Grilling. The recipe doesn't call the marinade teriyaki, but that's what it is.


Ingredients:
1/2 c. shoyu (soy sauce) or tamari
1/2 c. (or so) sliced green onions or chives (We used chives, because we have them in our yard. They were about to die due to the changing weather, and this seemed a fitting use for them.)
1/4 c. packed brown sugar
Freshly pressed garlic (a couple cloves)
1/4 t. (or a bit more) ground ginger
1/4 t. (or a bit more) freshly ground black pepper
2 1/2 lb. (or so) beef rib steak

Combine all the ingredients except for the meat in a container about the size of the steak(s) or in a zip-top plastic bag. Add the steaks and move them around so they get coated with the marinade. Refrigerate for at least 8 hours (we did ours overnight), turning occasionally to distribute marinade. Remove steaks and grill over medium-high heat for 8-10 minutes or until they're cooked the way you like them. You can boil the remaining marinade and pour it over the plated steak and/or you can drizzle it on a side veggie.

Comments:
Delicious.

Tuesday, November 1, 2011

Seasoned Grilled-in-Husk Sweet Corn

Steve found this recipe last week in Taste of Home: Backyard Grilling, which he got as a birthday gift a couple years ago from my brother and sister-in-law. We thought we'd have to wait until next summer to use the recipe but were pleasantly surprised to see corn in our share again this week.


Ingredients:
4 ears of sweet corn in husks
3 T. butter, softened
1 T. minced fresh parsley
1 t. chili powder
1/2 t. garlic salt (If you, like us, don't have garlic salt, you can use a mixture of granulated garlic and salt.)
1/2 t. ground cumin

Carefully peel back the husks from the ears of corn to within 1 inch of the bottom. Remove silk and compost. Combine remaining ingredients and spread over the corn. Rewrap each ear in its husk and secure with string. Put the corn in a big pot and cover with cold water. Soak for 20 minutes, then drain. Grill the corn for 10-15 minutes or until tender, turning frequently.

Comments:
This was tasty to the same extent that our regular grilled corn (minus the lime and Parmesan) is tasty. Meaning that all the effort of seasoning this was pointless, because it tasted the same as normal. I'm not quite sure what happened to all the extra flavor, which was definitely noticeable in the butter mixture before grilling. The seasoning was still visible post-grilling, but it didn't taste like anything anymore. On a positive note, we do think that soaking and grilling the corn in its own husk may help the corn be moister. We may do that again. But we'll skip the peeling and seasoning beforehand.